

Yesterday I spent the entire day making papers on Penn's Gelli Plate. This was the end result of 6 1/2 hours of non-stop printing-a 1 1/2 inch thick stack of yummy papers EIGHTY IN TOTAL (!!!) I can use however I please! (Made with a fracture wrist, no less! I've decided that either I am insane or just really hardcore about art!)
Penn gave me a quick demo and then I go to work playing with all the possible colour combinations I could come up with. She and I own a fair bit of cheap acrylic paints, so there were lots of colours to choose from. Penn also owns a ton of stencils, to the combinations really were endless.
Here are a few samples:

Left: Made using a simple circle stencil.
Right: I used a number stencil, which I put on backwards, but I really don't think it matters-it's still cool.

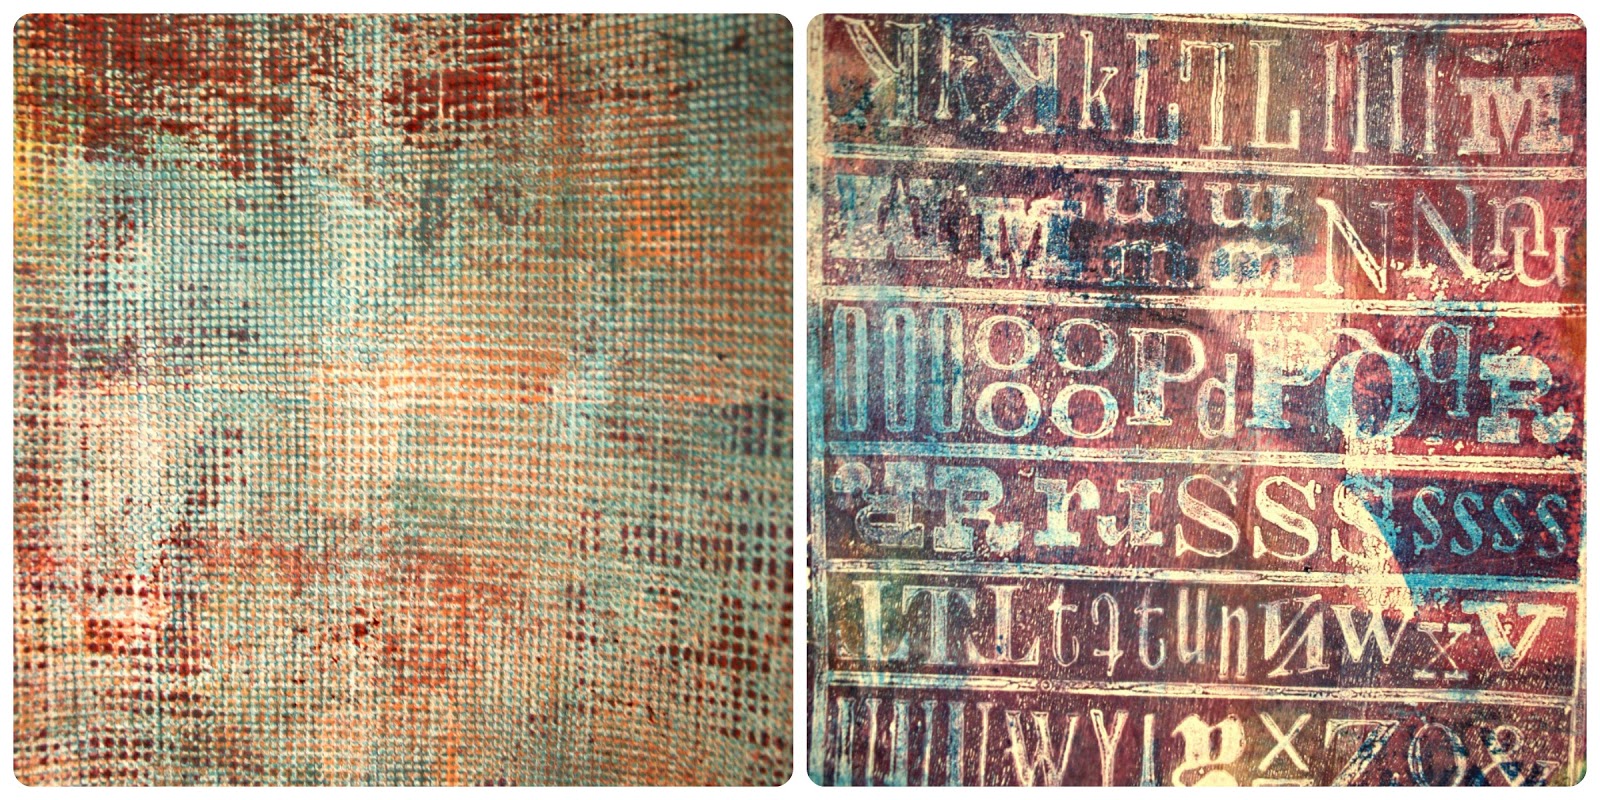
Left: Using a Cathedral Windows stencil.
Right: The circle stencil again, but printing the black circles first and then over printing them with straight colour. This is one of my most favourite papers. It's very Basic Grey-like.
Left: I used a rough organic like material that is loosely grid-like. This is my other most favourite paper. Again, very much like Basic Grey's style, which I love so much.
Right: I used a grid of plastic letters which are actually stickers. Penn took the sticky off using baby powder. The letter are sort of the kind you might see in old fashioned restaurant menu boards.
Sadly, the colours here are not as vibrant or true as they appear in real life, but at least you get the idea. I took some photos of the process of using the Gelli Plate so you can see how simple it is:

All you need are cheap dollar store acrylic paints. The paint needs to be thin and runny, so save your Goldens for other projects. Bright primary colours work so much better than earth tones or muted shades. My favourite magic colours are always bright turquoise, a bright true orange, bubble gum pink and a grape purple. Add a dab of these to any other colours you are working with in any medium and you've got magic.
Stencils don't need to be store bought. Penn and I used a variety of things that were just lying around in our studios-old doilies, laces, plastic bottle caps, tools for making marks & scraping, etc. The lace doily pictured here is from the dollar store and is actually rubber.

First you squirt a small amount of paint onto the Gelli Plate and use a large brayer to spread it out evenly. You only need a thin coat. Next, you press your stencil into the paint. In this case, we used the number stickers I mentioned.

Next you lay your paper down on top of the plate and smooth it either using your hands or a brayer. We used cardstock weight papers to print on. Penn had some old tabbed dividers we used. The weight of the paper matters-it has to do with how the paint gets transferred, so regular computer paper doesn't get the best result. The paint needs somewhere to go, so thicker paper seems to work better.
Once you have smoothed the paper into the paint, you just peel it up gently and set it aside to dry. It dries almost instantly, so you can move on to your next print. If there's paint left on the Gelli Plate, that's great-we didn't clean it off, ever-we just kept adding paint because part of the magic is the wabi-sabi effect of having random colours and bits of left over stencil shapes show up in a completely different print.
I especially loved over printing my pages. If I got something I wasn't keen on, I just printed right over it. Some of my best papers were done this way. There really is no waste of paint or paper-everything is usable, including the stack of book pages we were using to clean the brayer off on, in between prints.
My plan is to colour copy my papers to use in future art projects. Penn and I are also copying our pages for each other and we'll trade. Since all our pages were made using binder tabs, they are already 3 hole punched, so I will trim the tabs off and pop them into a binder for storage.
Now all I need to do is get myself a Gelli Plate! The 8 1/2 x 11 is $30. That's very inexpensive when you consider how much you can create with it! There are tons of video tutorials online of ways to use it too, so the possibilities are endless! Penn says the plates are only available online via the Gelli company so far, so if you want one, you have to order it through them.
When I got home, there was mail waiting for me from my friend Lisa Call. Don't you just love the presentation?!?
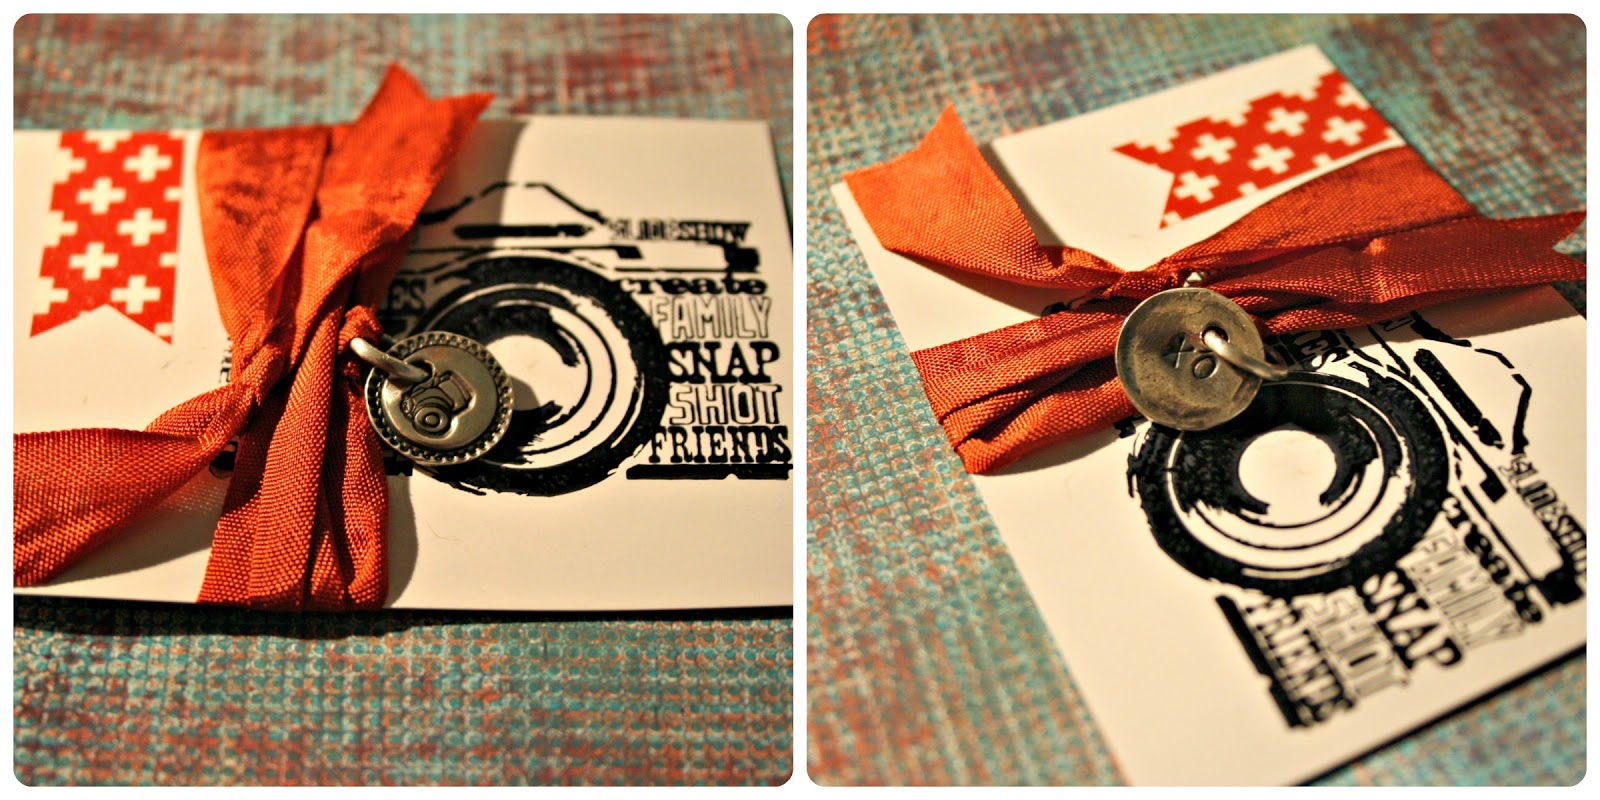
Lisa is a very talented Precious Metal Clay, jewelery and mixed media artist. Her work is exquisite. Years ago, at my first Artfibrefest, we met in person for the first time. She said she had a special gift for me and gave me a letter "L" charm. She was surprised to know I'd never owned anything with an "L" on it till that moment. I put it on my silver bracelet and I treasure it still. It was one of the sweetest and most unexpected gifts I've ever received.
Yesterday, she sent me this adorable camera charm she made for me, to add to my bracelet. If you look at the back, there is "XO" on it too. LOVE IT! I will treasure it forever as well. I was so surprised. Lisa, THANK YOU! You are so thoughtful!
All in all, it was a very lovely and productive day.
7 comments:
So glad it arrived safe and sound as US Postal Service was a little less about service when I was there.
Glad you enjoyed the gelli plating ... now you know why I'm so addicted! Apart from the gorgeous (and sometimes serendipitous) results, it has all the things I secretly yearn for in art-making: cheap materials, quick, easy, minimum waste and even portable (if you need it to be). And it's making me evaluate every object I come across with new criteria: I wonder if this will work on the gelli?
wow! this is so gorgeous!!
Great post Lelainia! I would love to repost some of your images to our Gelli Arts Pinterest Page and Facebook page but wanted to make sure you were OK with that :) Couldn't find an email address for you on the blog but please email me at nancy@gelliarts.com.
Happy Printing!
Nancy
If you buy it through blick art you can get 20% off a 6x6 or 8x10.
this is awesome Lelainia! Thanks for the tutorial and congrats on making Gelli's FB page :)
Big hugs to you,
Dawn
aka Mother Rubber
I so love the colours you used. Adorable prints ♥ Love all of them. It's such great fun ... once I begin I can hardly stop LOL Suzanne
Post a Comment